This article is an excerpt from NauticEd’s online Skipper Large Keelboats Course, a comprehensive online sailing course for beginner to intermediate sailors to learn how to sail large sailboats 26 ft (8m) and above. The Skipper Large Keelboats course is part of the Skipper Course Bundle of online courses, also teaching you how to master maneuvering under power and docking!
You can learn to sail and improve your sailing with NauticEd, the international leader in sailing education.
Securing Your Sailboat
Set up Your Home Slip
It is convenient to have dock lines that are pre-set to the right length with loops on the end and are permanently mounted onto the marina cleats. Now, when you return to the dock you simply slip the loops over your vessel cleats.
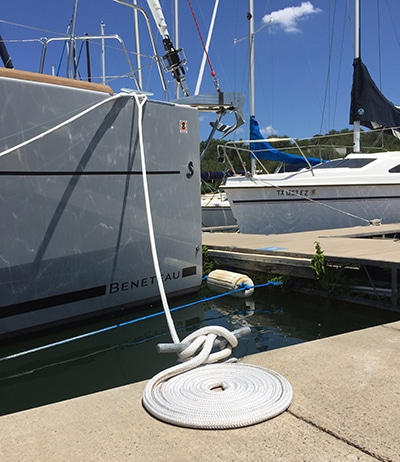
A Permanently Mounted Dockline
Also, have pre-set fenders, dock wheels, and plastic rub rails, mounted to the dock. All these will save ding after ding after ding on your boat.
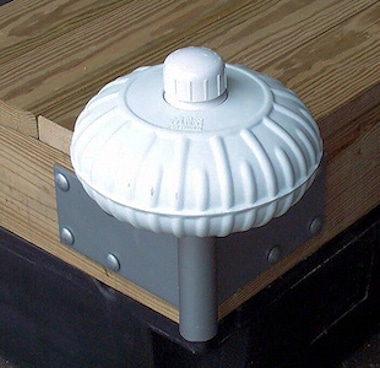
A Dock Wheel
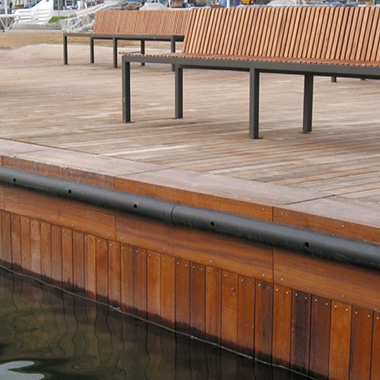
Marina Rub Rail
However, there are complications that will make the perfect docking maneuver not so perfect and not so easy about every 1 in 5 times. Wind strength, direction, and current will affect your ability to dock smoothly. You may need to use a dock line to lever your boat into the dock (called spinging in). Additionally, you will be visiting unfamiliar docks; perhaps a restaurant dock or a dock in a new port.
For these reasons, you need to keep extra dock lines on board.
Unfamiliar Docks
Make your plan but have contingency plans also. There is always the possibility that space is not available where you thought you were going to park your boat. If this is the case you may find you need to swap sides of fenders and dock lines. Sometimes when going into an unfamiliar harbor, it is prudent to set dock lines to both sides.
Preparation to secure the vessel should include a contingency plan of having to at the last minute dock the boat on the opposite side than expected. Perhaps the planned slip or end tie is occupied or difficult to get into with regard to other vessels or wind. Having your crew unaware of this potential is a bad formula for successful and damage-free docking.
Securing the vessel is an art!
Use separate lines for each function. Attach them to the dock cleat then bring them back on board so that the lines can be adjusted independently from the boat, especially if you are staying on the boat.
The following are recommended placements for dock lines, depending on the manner in which you are docked.
Notice that there are no lines that run from the boat perpendicular to the dock. Instead, all lines are run at angles. Dock lines are typically made of slightly stretchable nylon rope. The longer the line the more stretch there is in a line. Thus, dock lines at an angle are called spring lines. In this manner any waves that come through from wakes allow the boat to rise up and down and back and forth without harshly yanking on the cleats thus saving potential damage to the boat (and dock). Make sure there are adequate fenders and they are tied at the correct height.
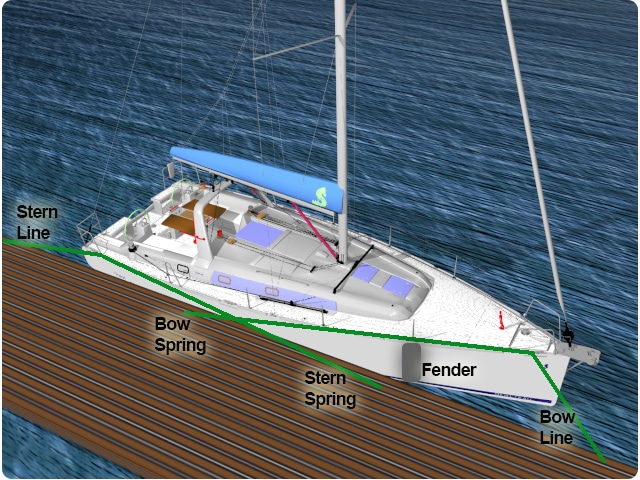
Dock Line Placement
Lines around pylons are best tied with a round turn and two half hitches. To a docking ring, you can simply go through the dock ring and back to the boat cleat or use a bowline knot with an extra round turn through the ring to prevent chafe. A round turn with two half hitches could also be used for a dock ring.
When tying two boats together, whether at the dock or under anchor, stagger the boats so that the cleats do not line up. This allows you to set spring lines at angles.
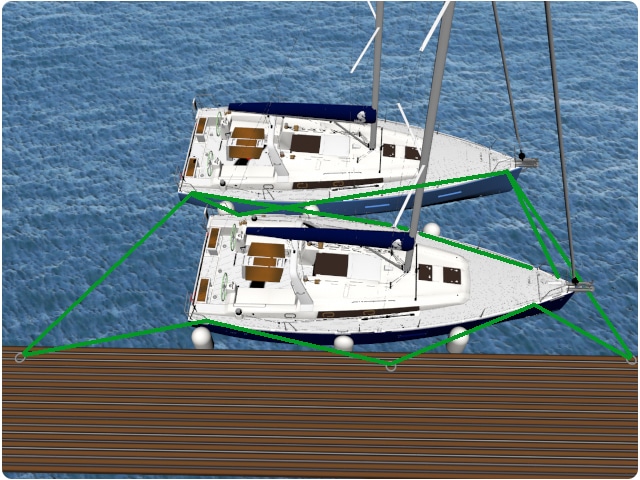
Dock Line Placement Two Boats
When a tide exists ensure you allow for the dock lines to be long enough to go with the tide. The length of dock lines should be at least 4 times the height of the tide.
Click on the image here:
Docking with a Tide
Many marinas have outer pylons. Capture the windward pylon and the marina tie ring first.
Docking with Pylons
After securing the boat, relax for a few minutes to decompress and rejoice that you landed without any problems. Following that perform a shut-down procedure. It’s a good idea to develop a standard written checklist that you follow each time after docking so that you do not forget vital close-down procedures.
This shutdown procedure is one that you can download and print out, put into a large Ziploc plastic bag, and stow in the chart table. Feel free to personalize. This list is great for sharing boats too.
You can learn more in the Skipper Course....
Knowledge and theory for longer distances and overnight sailing in diverse conditions. The Skipper Course is a comprehensive online sailing course for beginner to intermediate sailors wanting to learn how to sail larger sailboats 26ft to 56ft. Or upgrade to the Skipper Course Bundle of online courses to also master maneuvering under power and docking!